
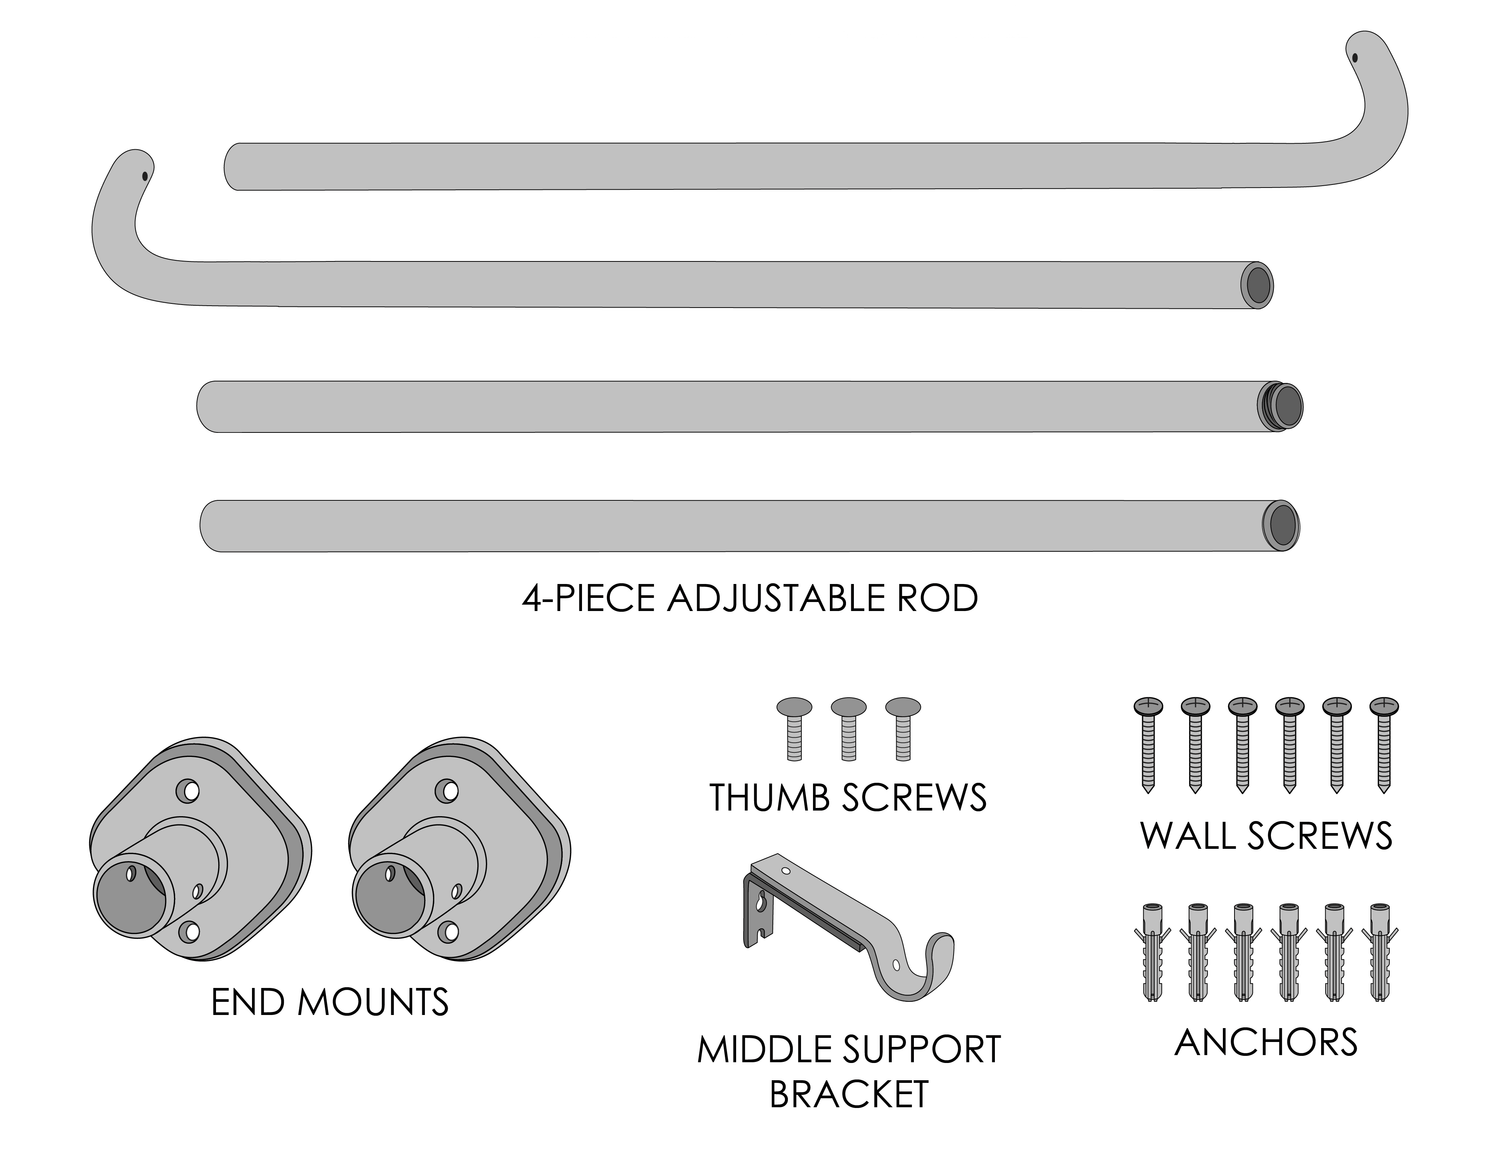
What's Included
4x Adjustable Rod Pieces
2x End Mounts
1x Middle Support Bracket
6x Wall Screws
6x Wall Anchors
3x Thumb Screws
Gather your Tools
STEP 2
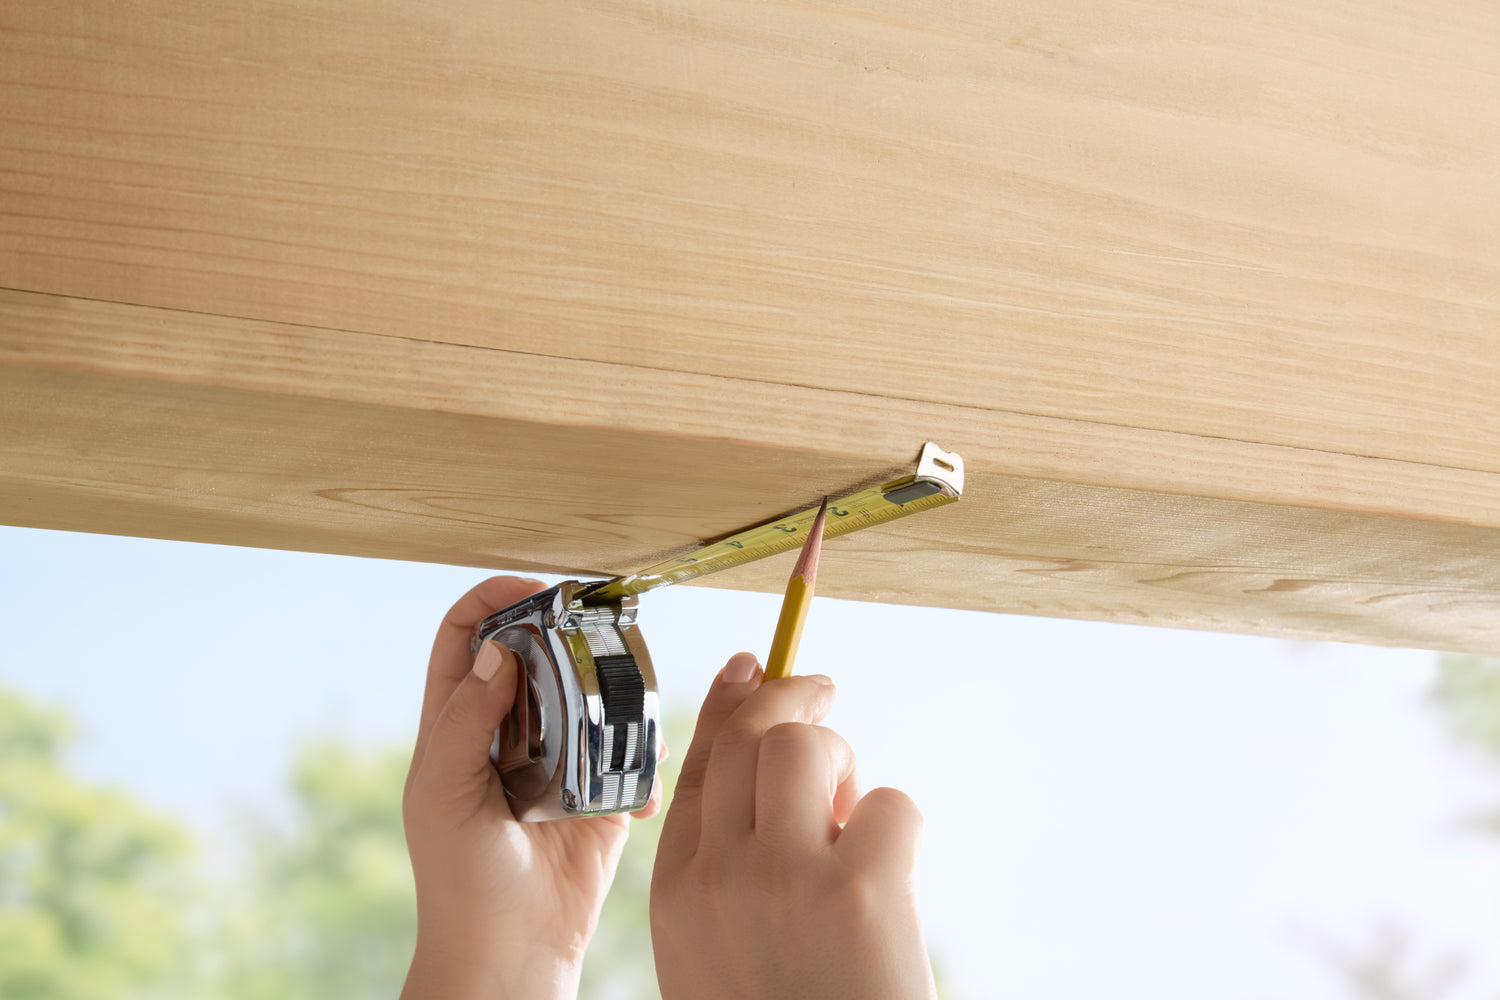
Mark Your Mount Position
Choose the desired location above your window or outdoor frame.
Mark the screw locations with a pencil, ensuring your mounts will be evenly spaced from the frame or structure's edge.
Drill Holes and Insert Anchors
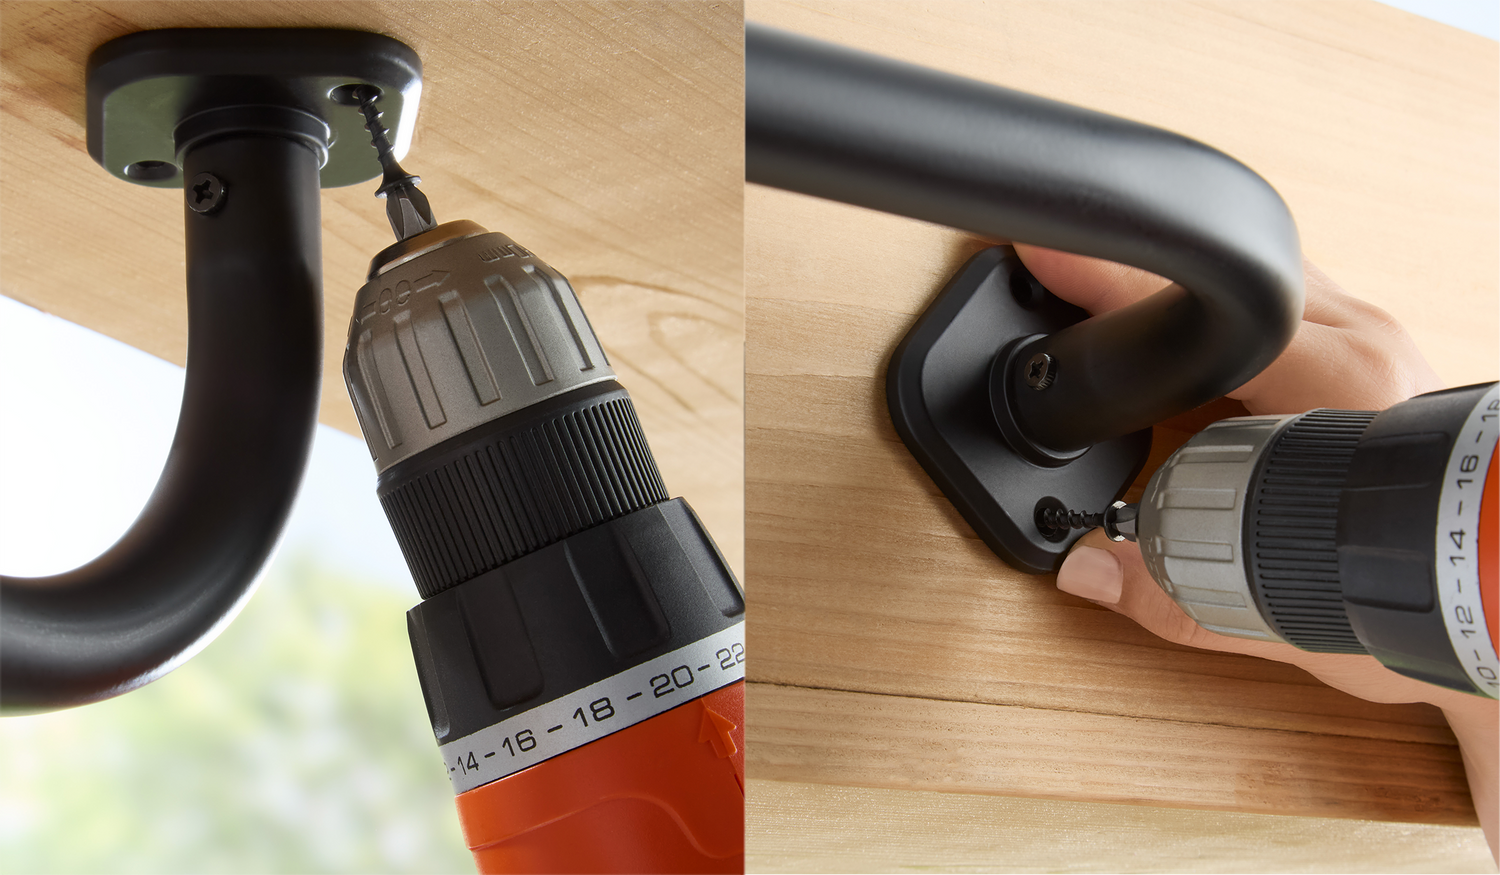
STEP 4
Secure the Brackets
Attach the end brackets using the provided screws, making sure they're firmly in place.
Find the middle point between the two end pieces and secure your third support bracket.
STEP 5
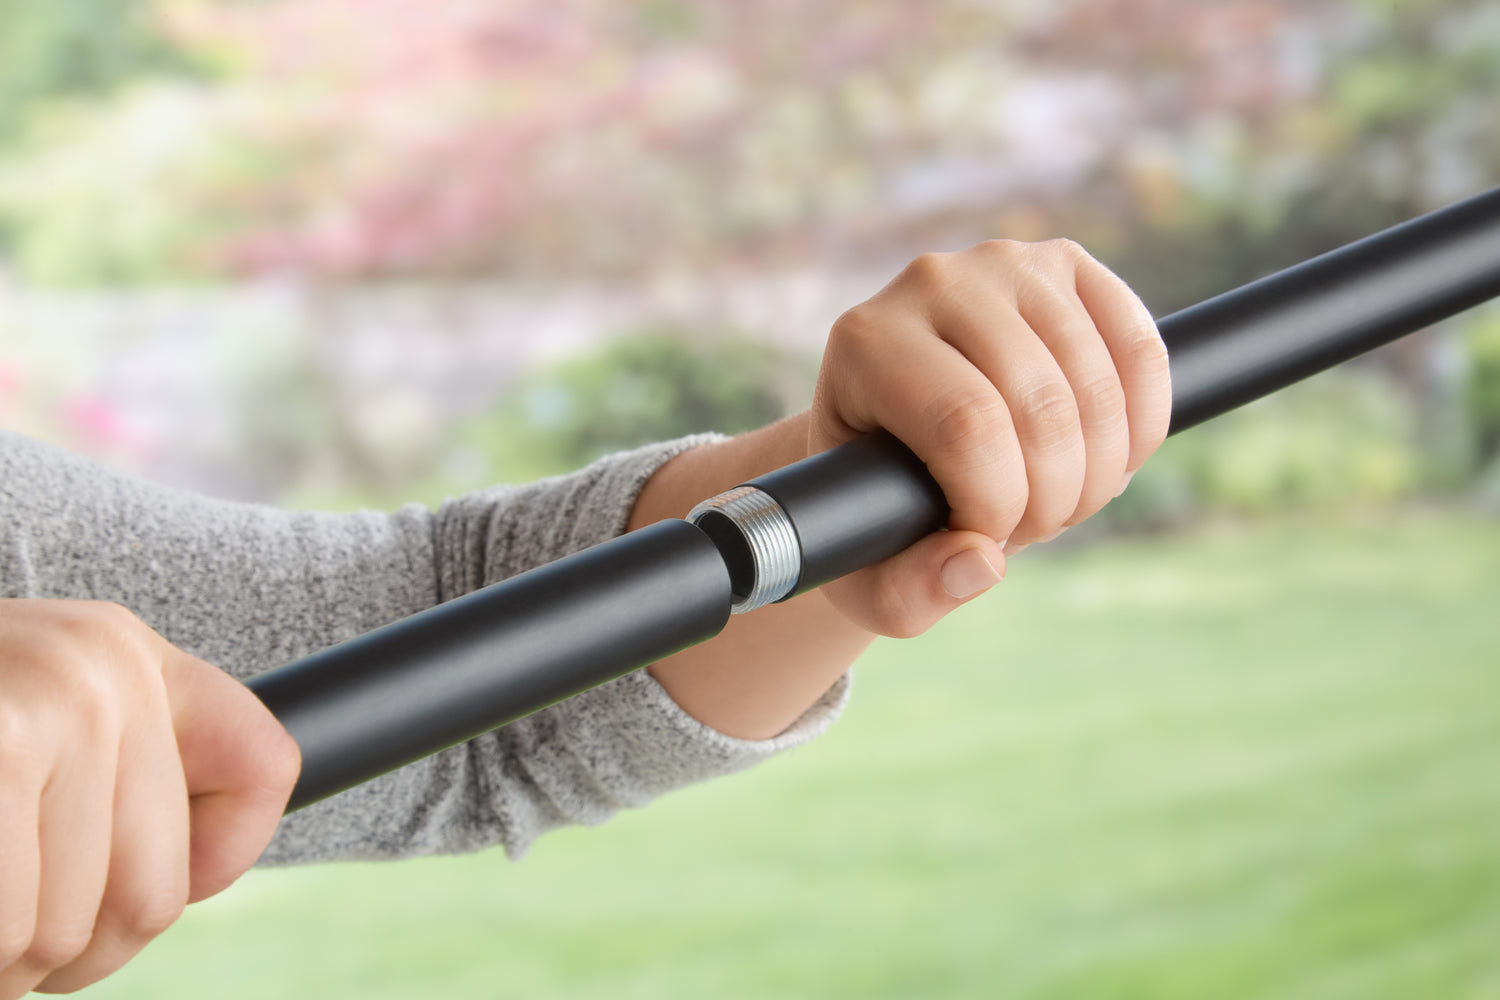
Assemble the Rod
Connect the two thicker rods to form the main center piece by screwing them together.
Insert the curved end rods into either side of the main center piece.
STEP 6
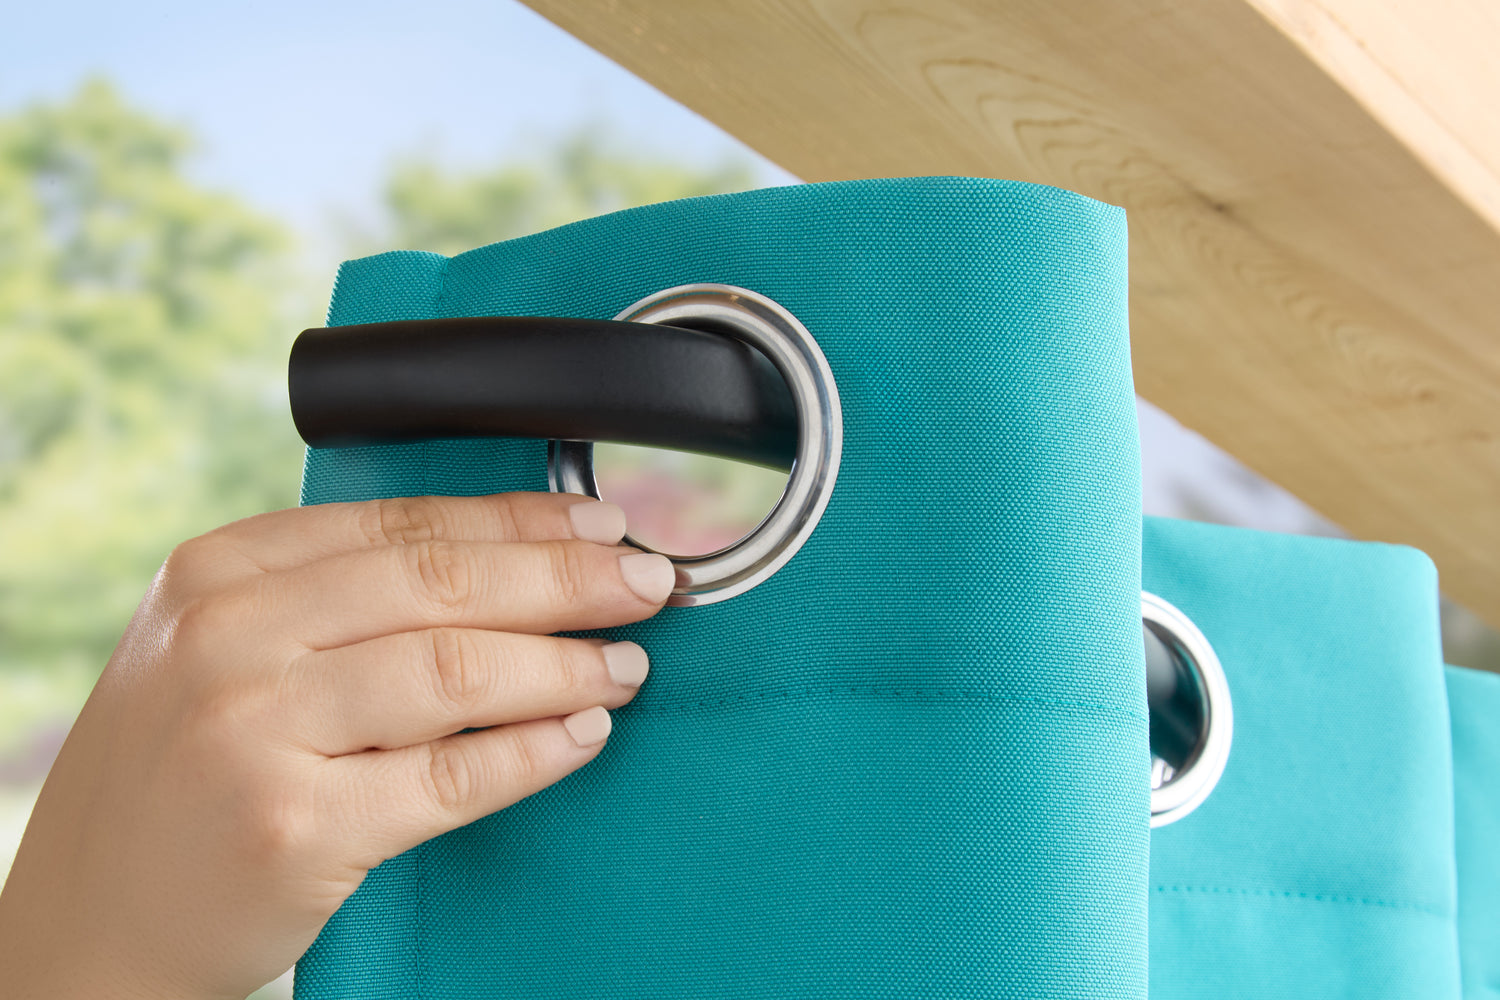
Add Curtains
Slide the curtains onto the end of the rod.
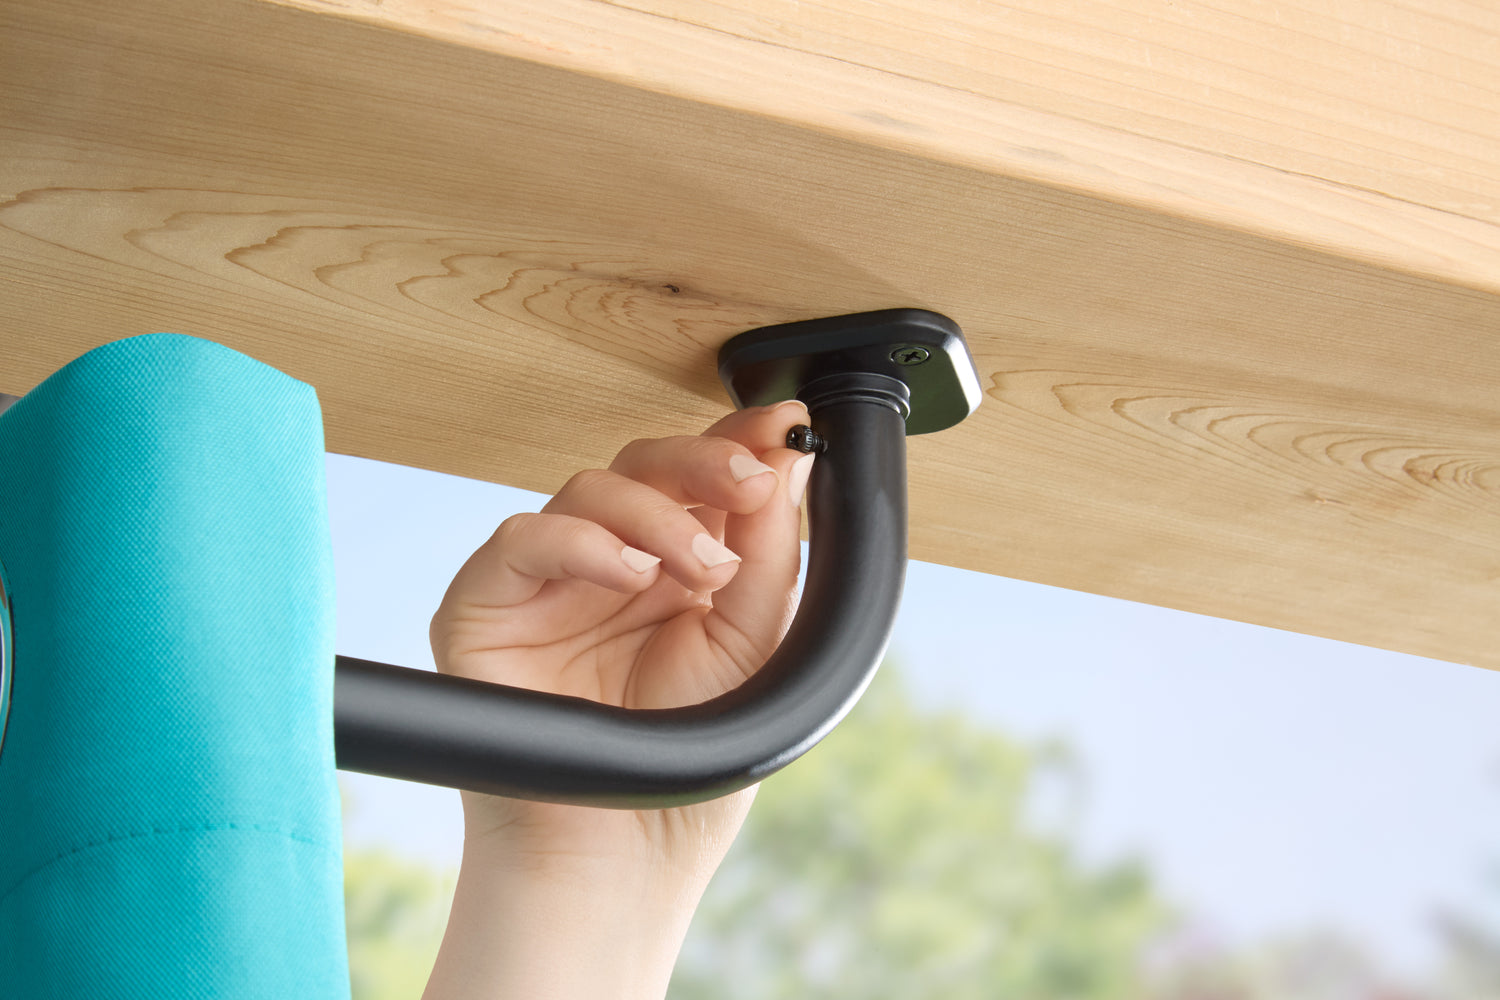
STEP 7
Mount and Secure the Rod
Place the assembled rod onto the brackets and tighten the thumb screws to secure in place.